Instruction on how to install a rear spoiler on a Lexus GS4/3/LS/IS
Installation is performed on a 1999 GS400
Written by: Anh Dang (aka BananaGS, http://bananags.netfirms.com )
Do not use or modify the contents of this document in anyway without my permission.
The instruction is for your information only. Read it carefully. I will NOT be held responsible for any mishaps or damage to your car.
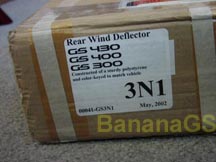
Unpack the packet after receiving from Lexus-Parts.com
- Make sure you are not missing any parts: spoilers, 4 mounting screws, 2 electrical taps, 2 drill templates
- The spoiler comes pre-painted matching your car color with all the hardware and installation instruction. Genuine Lexus Quality Only!!!
Est. Time to complete: 1hrs. Take your time.
Tool needed and preparations:
- Make sure you wash your car (at least the trunk lid)
- Tools:
o 1/16", 1/8", 5/32" DRILL BIT
o 5/16" or 7/32" DRILL BIT
o ELECTRIC DRILL
o PHILLIPS and FLAT SCREW DRIVER (your Lexus tool kit in the trunk has this screw driver)
o PRIMER/TOUCH UP PAINT (any color, prefer your car color)
o ELECTRICAL TAPE
o MASKING TAPE
(DO read the whole instruction before attempting the installation)
|
|
|
|
STEP 1:
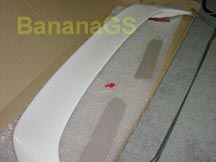
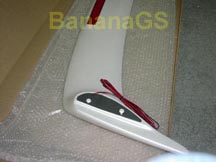
- Make sure you check the fitting of the spoiler on your car (put it on the trunk lid, see how it looks/fits (remove the mounting screws install in the spoiler before trying it on, if not you will scratch the paint), and see if you will be able to mount it or not…)
- After test fit the spoiler, take it off, put it somewhere close by.
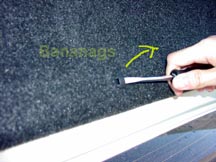
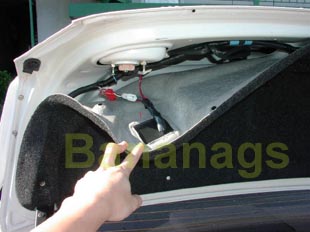
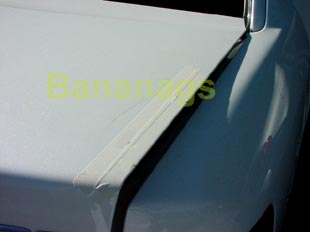
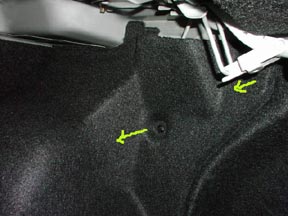
- Open the trunk lid, remove the carpet cover, just use your flat screw driver to pull the plastic lock nuts straight out (Figure 1,2) The location of the lock nuts are shown in the picture , just remove all the lock nuts, then the carpet will come off easily. show in picture (Figure 3)
|
Figure 1 |
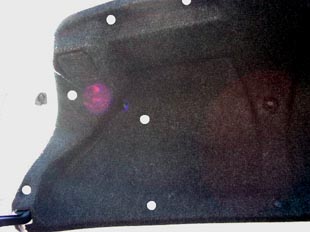 Figure 2 |
Figure 3 |
STEP 2:
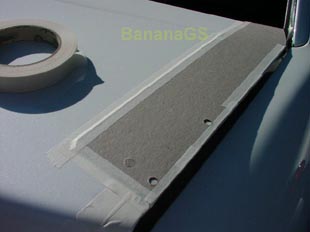
- Put some masking tape around the corner of the trunk lid, where you will drill the mounting holes to protect the paint (Figure 4)
- Place the paper Drill template (included with the spoiler) on the trunk lid, line up all the corner, secure the template with masking tape (Figure 5)
Notes: You will have to drill 2 holes on the passenger side, and 3 holes on the driver side of the trunk lid, use the appropriate drill-template
|
Figure 4 |
Figure 5 |
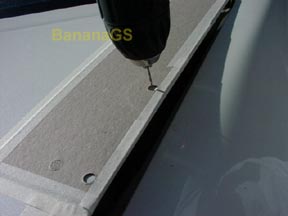
STEP 3:
- Use the smallest drill bit you can find (I used the 1/16” bit) to drill the center location of the holes. Don't use long drill bit.
- Work your way up, with bigger and bigger drill bit until the mounting screw fit through the holes (7/32")
§ Notes: Don't for get the 3rd hole on the drive side. This is for the LED brake light wiring. (Figure 8)
- Carefully remove the masking tape. Just make sure you remove the masking tape slowly, you don’t want the masking tape to pull the paint off your car.
|
Figure 6 |
Figure 7 (passenger side) |
 (driver side) |
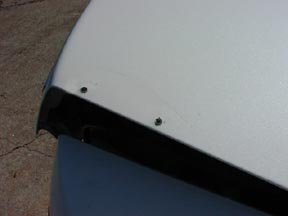
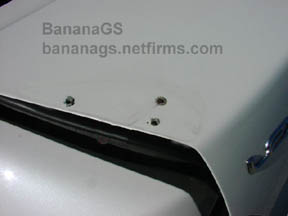
STEP 4:
- Make sure your trunk deck is clean from metal shaving after the drilling
- Apply a small amount of touch up paint to protect the bare metal around/inside the mounting hole. You don’t want them to get rust.
- Give it a few minutes for the touch up paint to dry. Put the spoiler on the car; make sure you run the 3rd brake light wire to the inside of the trunk through the hole you drilled for the 3rd brake light wiring
- Secure spoiler with included mounting screws (Figure 9) Get some one to hold the spoiler for you if needed.
|
Figure 9 |
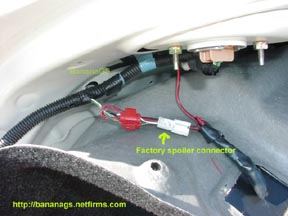
STEP 5:
- Make sure the spoiler is secured
- Open the trunk, connect the 3rd brake light wiring to the car 3rd brake light connector (Figure 10)
Green/Yellow is (+), connect the RED wire of the spoiler to this wire
White/Blk (-), connect the red/black wire of the spoiler to this wire. test you your 3rd brake.
- Re-install the trunk carpet cover in the reverse order of how you remove it.
- I did not replace install the trunk lift bars (included with the spoiler), instead, I just increased the tension on the bars by increase the bar to a highest setting (Figure 11,12) (for both sides) Remove the lock nuts (figure 11) to get to the tension adjusting location.
You can remove these bars and replaced with the one included with the spoiler if you like. If you get this far, I think you can do this on your own. (Figure 12)
|
Figure 10 |
Figure 11 |
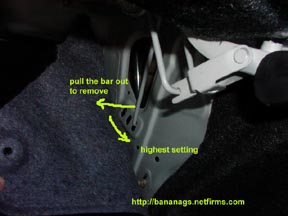 Figure 12 |
You can get a new Lexus brake light unit to disable your in-car 3rd brake light and a new rear deck. Or read my instruction on how to disable the in-car 3rd brake light on my homepage http://bananags.netfirms.com/
Good luck.
|
Find the information here useful to you? Please
consider donating some money to help keeping the site running
|
Contacts:
Darrel
Diller
E-commerce Parts Manager
(214)353-2826
ddiller@sewell.com
info@sewell.com
Anh Dang
End of Document.

This site is an enthusiast site. This site is NOT affiliated
with LEXUS,
a division of Toyota Motor Sales U.S.A., Inc. LEXUS and Toyota logos,
trademarks, service marks and copyrights are solely and exclusively owned by
Toyota Motor Sales U.S.A., Inc